OneNote is part of the Microsoft Office suite and is one of the programs that has enjoyed a strong presence in many classrooms in recent years. In this post, we explore why so many teachers and students embrace this application. OneNote can be compared to a digital binder where you can gather all notes and information in one place.
It’s very easy to get a good overview through organising notes, pictures, text, film and sound clips. OneNote makes it easy for teachers and students to write within the same document. The notebook can be shared and everyone will have immediate access to its contents if the notebook is placed in cloudstorage, such as OneDrive. OneNote is also free and available on all platforms. Furthermore, I’ll demonstrate how you can create class notebooks as teachers, and how you can use it in an educational setting.
The Wizard creating the class notebook ought to be run by the class tutor/point of contact. It’s not a requirement, but it simplifies the process with connections and affiliations from the school’s administrative system as the student groups are generally affiliated with their teacher.
The teacher or point of contact will first name the class notebook. Naming conventions will vary depending on what primary school grade you teach. In primary school the name ought to be tied with the class you’re teaching, but you should avoid stapling the name to a school year (for example 5A, 7B, etc.) By giving the class notebook a more common name like “A-Class 2005”, the notebook could potentially stay with the students over several years.
Do you want to learn more about OneNote?
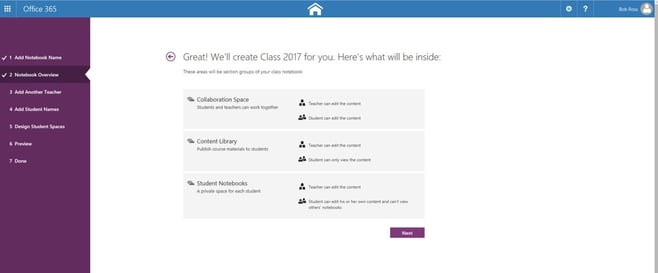
The class notebook will have a structure that is split into three sections:
Content Library:
This part of the book will function as the teacher’s textbook. Only the teachers will have "write-permissions". They’ll be able to copy content to their portion of the class book, but they won’t be able to edit anything in this section. This would be the natural part in the book where teachers publish subject material to their students.
Collaboration Area:
This is a shared section for teachers and students. Everyone will have full write-permissions. It's maybe where you get students to brainstorm ideas or write book reviews for the whole class to read.
Student Subdivisions:
The last section is for the student books. This is where the students gather up their subject material and whatever homework they have. The teachers and the individual students will have full read and write-permissions in their own student book. The teachers will have access to all student books, but the individual student will only see his or her own.
The teacher or point of contact will be able to add other teachers, who will also automatically get admin rights to the class notebook. You can add student lists from the school’s administrative system or write each student in individually via an email address. My recommendation is to add the students manually, as it simplifies work if a student happens to move or join the class during the school year.
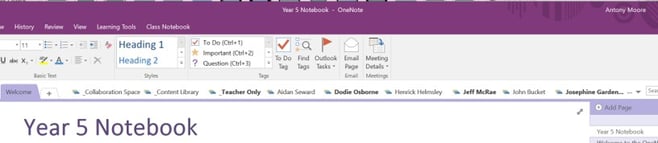
Later in the Wizard you can design the student portion of the class notebook. Here you can create the subdivisions you want your students to have available in their books. There are four subdivision templates already installed, but these are optional and you can create your own by clicking “add more”. The subdivisions you wish to create here would be the subjects you want your students to use OneNote with. There are also options to create these subdivisions later, directly from OneNote.
After the class notebook has been created, you’ll have the option of downloading a class notebook add-in which will be located in the OneNote menu, and I strongly recommend doing this. It simplifies page distribution and homework retrieval for the teacher. It also gives you a choice whether you want to open the class notebook in online mode or import it to your local OneNote (offline and usually saved in My Documents). If you have OneNote fully installed, I recommend using it as it has several useful functions you can use during class.
If you would like to learn more on how to get started with OneNote, we have an online training session for you.

Skooler has also developed their own add-in for OneNote which makes your day significantly more effective. Read what Microsoft wrote about our add-in, and watch our video that shows how Skooler is integrated into OneNote.